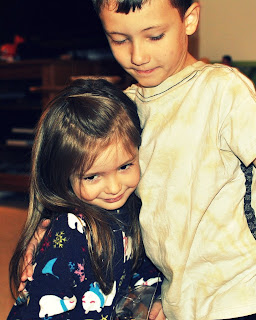
"Pixies View" available as prints, iPhone cases/skins, and cards here: http://society6.com/BethThompson/Pixies-View_Print
Saturday, June 23, 2012
Pixie's View Palette
How about a soothing, neutral palette today?
"Pixies View" available as prints, iPhone cases/skins, and cards here: http://society6.com/BethThompson/Pixies-View_Print
Tuesday, June 12, 2012
"From the Ground" Color Palette
These are so fun to make! Enjoy my newest palette, created from my print called, "From the Ground", available on prints and products here:
http://society6.com/BethThompson/From-the-Ground_Print
Sunday, June 10, 2012
Leaf it to Me Color Palette
I'm starting a new segment on my little blog here for color palettes created from my art and photography pieces. Let's start with the newest one. Since it's oh so girly and would be a great palette for a girly girl's room. My daughter is the epitome of girly, so I gravitate towards palettes she will like. We'll switch it up next time of course. :)
Art prints and products with this piece can be found here:
http://society6.com/BethThompson/Leaf-it-to-me_Print
and here:
http://www.redbubble.com/people/beththompsonart/works/8968594-leaf-it-to-me
Art prints and products with this piece can be found here:
http://society6.com/BethThompson/Leaf-it-to-me_Print
and here:
http://www.redbubble.com/people/beththompsonart/works/8968594-leaf-it-to-me
Wednesday, May 2, 2012
BOGO FREE SALE!
Yes, you read that right, BUY ONE get one FREE! Only in my Etsy shop at http://bethjt.etsy.com on Photography prints and ACEOs. Just click on those sections and buy one print, then tell me in the notes to seller which print of equal or lesser value FREE. I love that word, let's say it again, FREE!
Spread the word! If someone purchases a print and tells me you sent them, I'll send you BOTH a bookmark of your choice FREE too. Make sure they know to give me your email so I can get in contact with you. (I never spam email addresses!)
Wednesday, January 18, 2012
Yummy Easy Baked Eggs
I recently saw an idea online for baked eggs, and decided to try it one night with what I had on hand. It was so easy and so delicious, if you're an egg eater, you've got to try it. It only takes five minutes to prepare.
What you'll need:


A small oven safe crock or ramekin, one for each person you're feeding.
Two eggs (per crock)
Sea Salt
Ground pepper
Parmesan, grated
Oregano
Real bacon pieces
Shredded cheese, whatever kind is your favorite.
Cooking spray (or use butter, but
I like to avoid that when it's not necessary)
Preheat oven to 375 F. Spray your crock with the cooking spray. Crack two eggs into it. Don't stir or beat them, just let them sit whole (unless you don't like eggs if they're not scrambled, then scramble away).
Sprinkle sea salt, ground pepper, parmesan, oregano, and bacon on top. Again, don't stir anything, just sprinkle it over the top.
Put the crock in the oven. My oven is a bit low temp, so it takes anywhere from 25-30 minutes
to get the eggs as firm as I like them. If you like your eggs softer or runny, use less time. You can check them from time to time after around 15 minutes with a fork and see how they are doing.
Once the eggs are the way you like, pull the crock out of the oven. Sprinkle your shredded cheese on top and cover the crock with something for a few minutes to let the cheese melt.
Grab a fork, eat it! And try not to go right back in the kitchen and make another like I almost did the first time.
Imagine all the possibilities, you could put anything you want in there! Mushrooms, olives, ham, spinach...what do you like in omelettes? Put it in! Or do what I did and grab whatever you've got on hand. No butter, no frying, that's a bonus. Serve with toast, fruit...whatever.
Thursday, November 10, 2011
Multi-strand Yarn Box
How many times have you sat crocheting with a skein on each side of you, just daring them to fall or cross lines (paradox!) and going crazy because you don't even want to get up to take a break for fear of the consequences. Here's a simple solution I've been using for a few years now.
Materials: Lidded box, 1/2 inch rubber grommets, Dremel. (if you don't have one yourself, ask around, someone will!)
I got this cool divided box from Ikea for $9.99. But you can use any lidded box that will fit two yarn skeins in it. Make sure they don't fit too tightly, you don't want them jammed in there. You want the yarn to be able to come out of the skein freely. Take your yarn with you when you shop!
The 1/2 inch rubber grommets are from Home Depot, I'm sure they have them at most hardware stores. These were in the plumbing section, not that I pretend to know why.
First trace the inner hole of your grommet where you want the hole to go with a pen. Then use your Dremel to burrow out the whole. After a few trials, I found this easiest by starting in the middle of the circle and slowly moving outwards to the traced circle. You want to go just a little bit bigger than your traced hole to make getting the grommet in easier, but just a smidge. You can also do it the mathematician way and actually measure out a 1/2 inch hole and be all precise about it. Pinch the grommet, stuff it in the hole, and voila! A nice safe hole for your yarn to come through without being damaged or snagged.
I put two holes side by side on the long side of the box for shorter skeins, and two closer together vertically on the short side of the box for longer skeins. The ones on the ends can be used for the longer skeins stacked on top of each other rather than side by side like the shorter balls or skeins.
Now it'll be easy to set your project aside and even travel with it without those evil crossed lines and tangled skeins. Have fun!
Thursday, July 7, 2011
T-Shirt Giveaway! for Fans
It's time for a giveaway!
Yaaaaay! Come on, get up, jump around, you know you want to.
Want to win a t-shirt of YOUR CHOICE from my tee shop? Of course you do. Even if you're not a tee lover (really? why the heck not?) then someone you know is and it'll make a great gift!
To be eligible for entry, you must be a fan on Facebook...or a "liker" as it is these days.
Entry is super easy. Simply enter your email in the form on my facebook page. (Look for the S logo on the tabs on the left, where it says Free Tee.) If I get up to 250 likes by July 15th, I'll draw for a second tee! So tell your friends and up your chances.
For an extra entry, go to my shop and comment on this blog post telling me which tee you would choose if you win!

The small print: No purchase necessary and no cost at all to you. No shipping, no tax, no "handling", no membership fees, no subscriptions...this is a true giveaway. This giveaway is in no way sponsored, endorsed or administered by, or associated with, Facebook. Your contact info, i.e. email, will not be used or distributed in any way. I won't spam you, I promise. I will only use it to contact you about winning.
Sorry, only USA and Canada can enter. (yes, of course that includes APO/FPO)
"So if this doesn't cost me anything, why are you doing it?" Thank you to my fans, advertising for me and new fans for my biz. Simple as that.
Drawing for this giveaway will use random.org to be fair and impartial.
Last day to enter is Friday, July 15th.
Friday, June 17, 2011
Beth Thompson Art
Hey all, I know I've been MIA. My wrist started giving me fits after the holiday rush, and it just isn't getting better. I'm not able to crochet, and hence not able to make new patterns or any inventory. I can't even do the special requests from my fabulous customers. I'm sorry, and I hope in the near future it'll get better and I can get back to using this beautiful yarn collection I look at every day.
In the meantime, lucky me, I have a left arm too! And with that left arm I am able to draw again. So I've been working on the art side of my business while the right arm heals. And with that has come lots of new prints, photographs, and my tee shop is back open and chock full of lots of fun things to wear and use. Find me at my new homes:
Prints, photography, gifts: http://bethjt.etsy.com or http://www.beththompsonart.com
Facebook: http://www.facebook.com/beththompsonart
T-shirts etc: http://theteechick.spreadshirt.com
Make sure you click that like button on Facebook, I want to have a giveaway really soon! Thanks for your patience and good thoughts for my wrist to heal.
Sunday, December 26, 2010
Merry Christmas, Happy New Year, or whatever you celebrate at your house!
I hope everyone had a very Merry Christmas or a happy holiday season if that's not your thang. Our family had a great season. We went on a trip to Disney and had a wonderful time at home too. My daughter turned four at the beginning of the month as well. I've listed new patterns this month that have been a big hit, and I'm excited to get to the new year and create even more.
Drop me a note and tell me what your family did for the holidays. And in the meantime, enjoy a couple pics from ours.

Saturday, November 27, 2010
Update? Yes!
Oh it's been a busy year! I'm done with craft shows for the year, that was the big time eater. Here' s a pic or two from the shows. They were a blast and each one was totally worth my time and effort. Still not sure I'll do the big Food and Gift Festival at the Tacoma Dome again next year though...it was crazy! Five very long days of constant go go go. My whole family was affected, even my mom had to come up from Texas to help me. A bit much. But fun nonetheless. My aqua booth really stood out amongst everyone else's red and white backgrounds. I loved it. I was on the end of an aisle and got lots of traffic. Sales went above and beyond what I could have imagined, it was a blast. I literally sold 50%+ of my inventory, which for a craft show is huge as some of you know!
And here's one of my cute husband who was such a huge help and support during the Tacoma Dome show. He wore The Yarn Chick shirt and an apron without one complaint, haha! He wasn't able to be here for the second smaller show due to deployment, but I'm so thankful he was here for the first! Love you, Hon!
And a special huge thank you to my mom for coming up and helping me for three weeks with both shows and with the kids! You're the best, Mom!
So now that the shows are over I'm catching up on custom orders. I've got all the show orders done and out the door and now I'm working on all the ones from friends and family. Unfortunately I've been having some major pain in my wrist from so much crocheting the past few months, so they are slow going with me having to take 24-48 hour breaks from crocheting in between orders. Thank you to everyone for your patience and understanding. And for the tips for making my wrist feel better, they are really helping! But I'm determined to get them all done in plenty of time...then I can take a real break over the Christmas holiday.
So what's in store for the new year! New patterns! New products! And I'm excited to get started. First let's get through these holidays, shall we?
Oh and through November 29th you can get 25% off all patterns in both my Etsy and Artfire shops! Just enter code THXGIV10 at checkout.
Thursday, February 25, 2010
The kitties are growing
Some new pictures of our kittycats. They are so fun and snuggly, and mischievous! And they are growing like weeds. They are about 8 months old now.
Wednesday, January 20, 2010
I ♥ Hearts!
My new obsession, with Valentines Day coming up I came up with a little mini pattern for crocheted heart appliqués. There were a few online, but none of them worked exactly how I wanted. They are so fun to make and so cute!
I will be offering them as an add on for my hats in my shop, but thought I'd show you how they look now. A couple of these are too big for hats, but would look SO cute in a frame to decorate a little gi
rl's room, or sewn on a tote bag, or put on a card for V-day. So many cute ideas, what would you do with them?
UPDATE 10/7 - I wrote down the pattern and it is available in my artfire shop for free with any pattern purchase. Just use coupon code freeheart!
Monday, November 30, 2009
Drawing Tutorial - Hair - Stages 4-9
Sorry, don't know what happened to the images on these posts...I will try and fix them soon...
Continued!


STAGE 4: STILL laying down strokes in the direction of hairs. I continue to go back to the beginning and darken things up while making the lines longer and longer to shape the style.

STAGE 5: Keep molding the style...continuing to keep to the darkest areas. Avoid highlights, but make the strokes into the highlights very random and jagged. Also: Turn the paper as needed to make the direction of the hairs easier to draw.

STAGE 7: Here I take my tortillon, dirty or clean, doesn't matter. And go over the entire style in the direction of the hairs. Avoid crossing the strokes as much as possible to avoid a smudged look. Smooth everything out.
STAGE 8:Pick out highlights. I use my beloved "Hold-tu" putty and shape it into a sharp wedge. Then "draw" (drag) lines, uneven to each other, into the highlights so they blend into the pencil strokes and brighten the areas a bit. You could also do this with a sharp white eraser I'm sure, but the hold-tu works best for me.
Stay tuned for more of this portrait's stages. This concludes the hair tutorial. Thanks for the visit!


STAGE 6: Finish up the style. Continuously going back and darkening things up in layers.
STAGE 7: Here I take my tortillon, dirty or clean, doesn't matter. And go over the entire style in the direction of the hairs. Avoid crossing the strokes as much as possible to avoid a smudged look. Smooth everything out.
STAGE 8:Pick out highlights. I use my beloved "Hold-tu" putty and shape it into a sharp wedge. Then "draw" (drag) lines, uneven to each other, into the highlights so they blend into the pencil strokes and brighten the areas a bit. You could also do this with a sharp white eraser I'm sure, but the hold-tu works best for me.
STAGE 9: Time to push the darks! Go back over all dark areas with 3B again, or use something darker if you like. Add stray hairs around edges of curls and outside of the "border" of the head and also around the face. I avoided the face ones a bit since I haven't put the skins tones down yet. Give the illusion of individual hairs all over the head by drawing them at various pressures into highlighted areas. Continue to go back and push the darks until the very end of the drawing. You will add a lot more stray hairs at the end, when everything is done with skin, background etc...as a last step.
Stay tuned for more of this portrait's stages. This concludes the hair tutorial. Thanks for the visit!
Tuesday, November 24, 2009
Drawing Tutorial - Hair - Stages 1 to 3
This is a family requested self portrait that I turned into a hair tutorial for an art forum that I'm a moderator on. It's from a few years ago, but I thought I'd share it in stages during a few blog posts. As with all art, this is not a set in stone way to do things, but just the way I do it (in an accelerated tutorial type fashion, normally I'd spend days working on hair while this was done in an evening) and if used should be tweeked to fit your style. Enjoy.


STAGE 1: The outline. This is what it looks like when I've completed the sketch and then cleaned up all the yucky stray sketch lines and eraser lines. It looks dark here because I sketch very dark, going over and over my lines. But I then lighten it up by rolling blu-tack over
the entire sketch, which you'll see in stage 2.You'll see that with the hair I block in some of the highlighted areas, but I don't stay a slave to the picture...sometimes you can make it look much better!

STAGE 2: I am using a 3B 0.5 mechanical pencil through this entire tutorial, to keep it simple. I start laying down
strokes in the dark areas, following the direction of the hairs. I know usually these tutorials say, "Don't draw individual hairs, just block in color." Well...I draw hairs....it works for me!

STAGE 3: Continuing to lay down strokes in dark areas. It's important to be careful with the direction of the pencil strokes. If you go too fast and they go all over
the place, you end up with straw, instead of hair.
I'll stop there for this post. Three more stages in a few days. Thanks for stopping by!
Sunday, October 4, 2009
Some new additions to the Thompson Clan
Friday night we surprised our two kids by taking them to a lady's home who fosters kitties for the Humane Society. This is her blog about her foster kitties.
She had five amazing little babies to choose from and it was so difficult to make our decision. In the end we chose the ones that sucked up the most and that my son took a shine to right away.
They are two orange tabby brothers, that are not only hilariously playful, but very good little snuggle bugs too. They have incorporated themselves into our household like they were meant to be here all along. Meet Max:
Monday, September 14, 2009
Some quick pics of our camping trip and what I've been up to.
Oh my goodness, its been too long since I posted. I apologize to my followers. I have had a big surge of custom orders and I'm getting ready for the Fort Lewis Holiday Bazaar coming up the beginning of November. Plus family just always takes priority for me. This weekend we went camping on the amazing Olympic Peninsula. We camped at Lake Quinault and hiked all around the rain forest there. Saw some lovely waterfalls and walked through what felt like landscape of the dinosaur age. I couldn't get enough of taking pictures and was wishing I had my DSLR that I'm supposed to be getting for Christmas. Christmas!!! That's so far away haha. We also swung through Forks and Port Angeles, which was fun and interesting being a fan of the Twilight books. Here's a couple of pictures of our trip.

Labels:
family,
forks,
olympic peninsula,
twilight,
vacation,
washington
Monday, August 3, 2009
Easy Peezy Strawberry Cake
I used:
One box of yellow cake.
One box of strawberries, chopped and sliced.
Two packages of dream whip.
I followed the directions on the cake box for two 8 inch round cakes and baked them. I cooled them in the refrigerator while I chopped the strawberries. I chopped about 3/4ths of the strawberries and cut the rest into thin slices. I made sure there was no mushy bits, I hate those.
If you try this by my recommendation, I'd love to hear how you like it. My family couldn't get enough.
Note: I learned today from a friend that a bushel is 9 gallons HAHA, no I didn't buy 9 gallons, just a little box like you get at the produce store.
Sunday, August 2, 2009
More crochet fun - Soldier Boy
I had so much fun making this little guy. My soldier boy is about 3 1/2 inches high. He is a first prototype, so I see many more variations in my future.
PS, for those that are not familiar with the Army uniform, that's a beret on his head, not a huge toupee. ;)
Friday, July 31, 2009
Having some crochet fun
I've had this little guy brewing in my head for months. Last night I really wanted to make something fun, so I decided to give him a go. (Yes, he's a boy, my son said so. "It's okay for jellyfish boys to be pink.")
I had originally thought he'd be two colors, but while watching TV at the same I forgot to change colo
rs at the right time. haha. Oh well, he's cute this way too. I'll try a multi color one next time.
My son has named him "Jelly the Jellyfish" and has claimed him as his. What do you think?
Subscribe to:
Posts (Atom)