Tuesday, November 24, 2009

Drawing Tutorial - Hair - Stages 1 to 3

This is a family requested self portrait that I turned into a hair tutorial for an art forum that I'm a moderator on. It's from a few years ago, but I thought I'd share it in stages during a few blog posts. As with all art, this is not a set in stone way to do things, but just the way I do it (in an accelerated tutorial type fashion, normally I'd spend days working on hair while this was done in an evening) and if used should be tweeked to fit your style. Enjoy.


STAGE 1: The outline. This is what it looks like when I've completed the sketch and then cleaned up all the yucky stray sketch lines and eraser lines. It looks dark here because I sketch very dark, going over and over my lines. But I then lighten it up by rolling blu-tack over
the entire sketch, which you'll see in stage 2.You'll see that with the hair I block in some of the highlighted areas, but I don't stay a slave to the picture...sometimes you can make it look much better!


STAGE 2: I am using a 3B 0.5 mechanical pencil through this entire tutorial, to keep it simple. I start laying down
strokes in the dark areas, following the direction of the hairs. I know usually these tutorials say, "Don't draw individual hairs, just block in color." Well...I draw hairs....it works for me!


STAGE 3: Continuing to lay down strokes in dark areas. It's important to be careful with the direction of the pencil strokes. If you go too fast and they go all over
the place, you end up with straw, instead of hair.


I'll stop there for this post. Three more stages in a few days. Thanks for stopping by!

Sunday, October 4, 2009

More kitty pics


Because who can resist right.


Some new additions to the Thompson Clan

Friday night we surprised our two kids by taking them to a lady's home who fosters kitties for the Humane Society. This is her blog about her foster kitties.

She had five amazing little babies to choose from and it was so difficult to make our decision. In the end we chose the ones that sucked up the most and that my son took a shine to right away.
They are two orange tabby brothers, that are not only hilariously playful, but very good little snuggle bugs too. They have incorporated themselves into our household like they were meant to be here all along. Meet Max:


And Sam:

Monday, September 14, 2009

Some quick pics of our camping trip and what I've been up to.

Oh my goodness, its been too long since I posted. I apologize to my followers. I have had a big surge of custom orders and I'm getting ready for the Fort Lewis Holiday Bazaar coming up the beginning of November. Plus family just always takes priority for me. This weekend we went camping on the amazing Olympic Peninsula. We camped at Lake Quinault and hiked all around the rain forest there. Saw some lovely waterfalls and walked through what felt like landscape of the dinosaur age. I couldn't get enough of taking pictures and was wishing I had my DSLR that I'm supposed to be getting for Christmas. Christmas!!! That's so far away haha. We also swung through Forks and Port Angeles, which was fun and interesting being a fan of the Twilight books. Here's a couple of pictures of our trip.


Monday, August 3, 2009

Easy Peezy Strawberry Cake

I was craving a cake with fresh strawberries so we picked up a bushel (box, container whatever!)over the weekend. I couldn't find a recipe that was what I wanted so I winged it. I am not a domestic goddess by any means, so this is the simplest and most direct way I could get what I was craving.

I used:

One box of yellow cake.

One box of strawberries, chopped and sliced.

Two packages of dream whip.

I followed the directions on the cake box for two 8 inch round cakes and baked them. I cooled them in the refrigerator while I chopped the strawberries. I chopped about 3/4ths of the strawberries and cut the rest into thin slices. I made sure there was no mushy bits, I hate those.

Then I whipped up the first package of dream whip and mixed in the chopped strawberries. Pulled the bottom layer of cake out of the fridge and put it on the cake stand. Spread the strawberry/dream whip mix on top. There was a bit left over that I saved for the kids to eat as a snack the next day. Whipped up the second package of dream whip and stuck it in the freezer for a little bit because it was melting too fast to spread (it was 86 in my kitchen last night). Then I put the top layer of cake on top of the strawberry/dream whip layer. Spread the plain dream whip over entire cake. Top with sliced strawberries. And voila! Easy Strawberry Cake that was DELICIOUS and so perfect for summer. Store in the fridge or the dream whip will melt. And considering my skills in the kitchen, me saying it was easy is a big deal!

If you try this by my recommendation, I'd love to hear how you like it. My family couldn't get enough.

Note: I learned today from a friend that a bushel is 9 gallons HAHA, no I didn't buy 9 gallons, just a little box like you get at the produce store.

Sunday, August 2, 2009

More crochet fun - Soldier Boy

I had so much fun making this little guy. My soldier boy is about 3 1/2 inches high. He is a first prototype, so I see many more variations in my future.

PS, for those that are not familiar with the Army uniform, that's a beret on his head, not a huge toupee. ;)


Friday, July 31, 2009

Having some crochet fun


I've had this little guy brewing in my head for months. Last night I really wanted to make something fun, so I decided to give him a go. (Yes, he's a boy, my son said so. "It's okay for jellyfish boys to be pink.")
I had originally thought he'd be two colors, but while watching TV at the same I forgot to change colors at the right time. haha. Oh well, he's cute this way too. I'll try a multi color one next time.
My son has named him "Jelly the Jellyfish" and has claimed him as his. What do you think?

Monday, July 27, 2009

A recent happy purchase

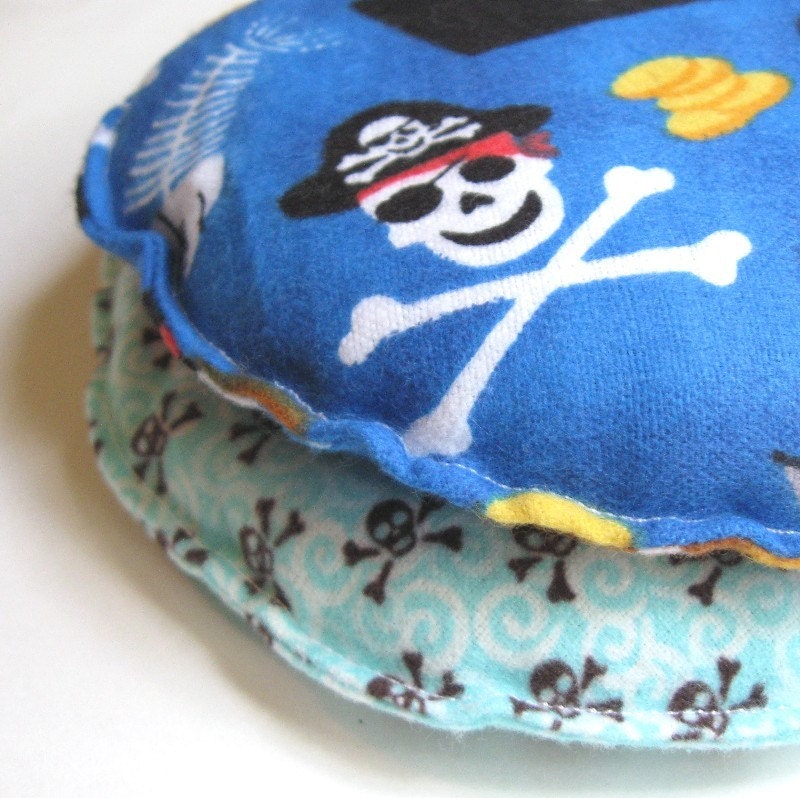
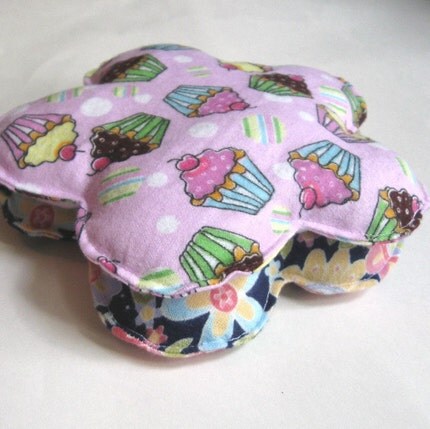
Once in a while I go looking for something on Etsy, and I just don't find exactly what I want. So I find someone who makes it close, and ask them if they can customize it for me. Recently I went looking for "boo boo bags" or cold packs, or whatever you want to call them. They are the fabric sewn pillows filled with flaxseed that you can put in the freezer or the microwave depending on what you need. There were lots of these in various forms, but I couldn't find any I liked with lavendar in them. For some reason my kids love these things for bed time. I had a pack of them I got from MommysLittleHelper last year, but she since closed down that shop to focus on her other shop, 1Maddieandme. I checked her shop, but she didn't have any up. So I found EnchantedDandelions had some nice big ones in daisy and round shapes in super cute fabrics. So I messaged her and asked if she could add lavendar for me. She was very accomodating and said it would be no problem. Yay! She let me pick my fabrics (see pictures, these are the exact ones I ordered) and I had them a week later. And we adore them! They are so cute and soft and perfect for bedtime in the summer. My kids each take one to bed with them to help them stay cool while trying to fall asleep. Here in WA state we have no A/C and bedtime is a little difficult. Not to mention every time there is a bump or even hurt feelings these calm them right down in a jiffy. Today I discovered I love them for myself too. As I sit here sweltering in the heat I decided to grab one from the freezer and see if it'd help. I sat it on my neck, and let me tell you, I cooled right down! Thank you, EnchantedDandelions for a wonderful purchase and Etsy buying experience!