Sunday, December 26, 2010

Merry Christmas, Happy New Year, or whatever you celebrate at your house!


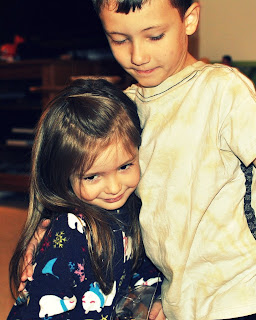
I hope everyone had a very Merry Christmas or a happy holiday season if that's not your thang. Our family had a great season. We went on a trip to Disney and had a wonderful time at home too. My daughter turned four at the beginning of the month as well. I've listed new patterns this month that have been a big hit, and I'm excited to get to the new year and create even more.

Drop me a note and tell me what your family did for the holidays. And in the meantime, enjoy a couple pics from ours.

Saturday, November 27, 2010

Update? Yes!

Oh it's been a busy year! I'm done with craft shows for the year, that was the big time eater. Here' s a pic or two from the shows. They were a blast and each one was totally worth my time and effort. Still not sure I'll do the big Food and Gift Festival at the Tacoma Dome again next year though...it was crazy! Five very long days of constant go go go. My whole family was affected, even my mom had to come up from Texas to help me. A bit much. But fun nonetheless. My aqua booth really stood out amongst everyone else's red and white backgrounds. I loved it. I was on the end of an aisle and got lots of traffic. Sales went above and beyond what I could have imagined, it was a blast. I literally sold 50%+ of my inventory, which for a craft show is huge as some of you know!


And here's one of my cute husband who was such a huge help and support during the Tacoma Dome show. He wore The Yarn Chick shirt and an apron without one complaint, haha! He wasn't able to be here for the second smaller show due to deployment, but I'm so thankful he was here for the first! Love you, Hon!

And a special huge thank you to my mom for coming up and helping me for three weeks with both shows and with the kids! You're the best, Mom!

So now that the shows are over I'm catching up on custom orders. I've got all the show orders done and out the door and now I'm working on all the ones from friends and family. Unfortunately I've been having some major pain in my wrist from so much crocheting the past few months, so they are slow going with me having to take 24-48 hour breaks from crocheting in between orders. Thank you to everyone for your patience and understanding. And for the tips for making my wrist feel better, they are really helping! But I'm determined to get them all done in plenty of time...then I can take a real break over the Christmas holiday.

So what's in store for the new year! New patterns! New products! And I'm excited to get started. First let's get through these holidays, shall we?

Oh and through November 29th you can get 25% off all patterns in both my Etsy and Artfire shops! Just enter code THXGIV10 at checkout.

Thursday, February 25, 2010

The kitties are growing

Some new pictures of our kittycats. They are so fun and snuggly, and mischievous! And they are growing like weeds. They are about 8 months old now.

Wednesday, January 20, 2010

I ♥ Hearts!


My new obsession, with Valentines Day coming up I came up with a little mini pattern for crocheted heart appliqués. There were a few online, but none of them worked exactly how I wanted. They are so fun to make and so cute!

I will be offering them as an add on for my hats in my shop, but thought I'd show you how they look now. A couple of these are too big for hats, but would look SO cute in a frame to decorate a little girl's room, or sewn on a tote bag, or put on a card for V-day. So many cute ideas, what would you do with them?

UPDATE 10/7 - I wrote down the pattern and it is available in my artfire shop for free with any pattern purchase. Just use coupon code freeheart!

Monday, November 30, 2009

Drawing Tutorial - Hair - Stages 4-9

Sorry, don't know what happened to the images on these posts...I will try and fix them soon...

Continued!


STAGE 4: STILL laying down strokes in the direction of hairs. I continue to go back to the beginning and darken things up while making the lines longer and longer to shape the style.


STAGE 5: Keep molding the style...continuing to keep to the darkest areas. Avoid highlights, but make the strokes into the highlights very random and jagged. Also: Turn the paper as needed to make the direction of the hairs easier to draw.


STAGE 6: Finish up the style. Continuously going back and darkening things up in layers.


STAGE 7: Here I take my tortillon, dirty or clean, doesn't matter. And go over the entire style in the direction of the hairs. Avoid crossing the strokes as much as possible to avoid a smudged look. Smooth everything out.


STAGE 8:Pick out highlights. I use my beloved "Hold-tu" putty and shape it into a sharp wedge. Then "draw" (drag) lines, uneven to each other, into the highlights so they blend into the pencil strokes and brighten the areas a bit. You could also do this with a sharp white eraser I'm sure, but the hold-tu works best for me.


STAGE 9: Time to push the darks! Go back over all dark areas with 3B again, or use something darker if you like. Add stray hairs around edges of curls and outside of the "border" of the head and also around the face. I avoided the face ones a bit since I haven't put the skins tones down yet. Give the illusion of individual hairs all over the head by drawing them at various pressures into highlighted areas. Continue to go back and push the darks until the very end of the drawing. You will add a lot more stray hairs at the end, when everything is done with skin, background etc...as a last step.


Stay tuned for more of this portrait's stages. This concludes the hair tutorial. Thanks for the visit!

Tuesday, November 24, 2009

Drawing Tutorial - Hair - Stages 1 to 3

This is a family requested self portrait that I turned into a hair tutorial for an art forum that I'm a moderator on. It's from a few years ago, but I thought I'd share it in stages during a few blog posts. As with all art, this is not a set in stone way to do things, but just the way I do it (in an accelerated tutorial type fashion, normally I'd spend days working on hair while this was done in an evening) and if used should be tweeked to fit your style. Enjoy.


STAGE 1: The outline. This is what it looks like when I've completed the sketch and then cleaned up all the yucky stray sketch lines and eraser lines. It looks dark here because I sketch very dark, going over and over my lines. But I then lighten it up by rolling blu-tack over
the entire sketch, which you'll see in stage 2.You'll see that with the hair I block in some of the highlighted areas, but I don't stay a slave to the picture...sometimes you can make it look much better!


STAGE 2: I am using a 3B 0.5 mechanical pencil through this entire tutorial, to keep it simple. I start laying down
strokes in the dark areas, following the direction of the hairs. I know usually these tutorials say, "Don't draw individual hairs, just block in color." Well...I draw hairs....it works for me!


STAGE 3: Continuing to lay down strokes in dark areas. It's important to be careful with the direction of the pencil strokes. If you go too fast and they go all over
the place, you end up with straw, instead of hair.


I'll stop there for this post. Three more stages in a few days. Thanks for stopping by!

Sunday, October 4, 2009

More kitty pics


Because who can resist right.


Some new additions to the Thompson Clan

Friday night we surprised our two kids by taking them to a lady's home who fosters kitties for the Humane Society. This is her blog about her foster kitties.

She had five amazing little babies to choose from and it was so difficult to make our decision. In the end we chose the ones that sucked up the most and that my son took a shine to right away.
They are two orange tabby brothers, that are not only hilariously playful, but very good little snuggle bugs too. They have incorporated themselves into our household like they were meant to be here all along. Meet Max:


And Sam: